09 Feb Best Squat Rack for Home Gym – Ultimate Guide
Best Squat Rack for Home Gym: Your Complete Buying Guide
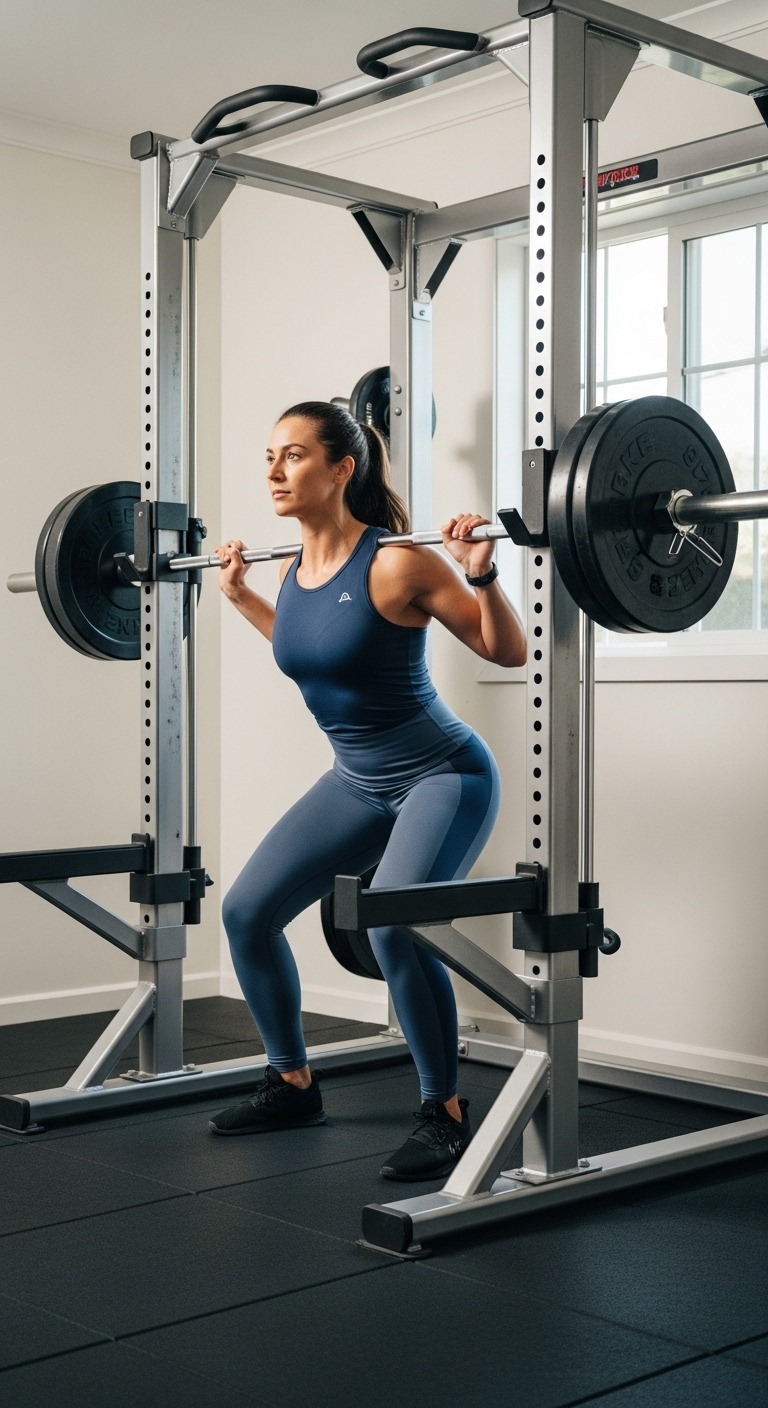
Finding the best squat rack for home gym setups can transform your fitness routine from mediocre to exceptional. Whether you’re a beginner or a seasoned lifter, the right squat rack becomes the centerpiece of your strength training arsenal.
best squat rack for home gym
Why You Need a Quality Squat Rack at Home
Home workouts have exploded in popularity, and for good reason. A solid squat rack eliminates excuses and puts professional-grade training right in your garage or spare room.
The convenience factor alone justifies the investment. No more driving to crowded gyms or waiting for equipment during peak hours.
Types of Squat Racks for Home Gyms
Full Power Racks
Power racks offer the ultimate safety and versatility for serious lifters. These four-posted beasts provide adjustable safety catches, pull-up bars, and attachment options for cables and accessories.
They’re perfect if you’re training alone and pushing heavy weights. The safety bars catch the barbell if you fail a rep, preventing injuries and giving you confidence to max out safely.
Half Racks
Half racks deliver solid functionality in a more compact footprint. They typically feature two uprights with j-hooks and spotter arms, making them ideal for smaller spaces.
These work great for those who want power rack benefits without sacrificing too much floor space. You’ll still get adjustable heights and safety features, just in a slimmer profile.
Squat Stands
Squat stands are the minimalist’s dream for home training. These independent units consist of two adjustable uprights that you can move around easily.
They’re budget-friendly and incredibly space-efficient. However, they lack the built-in safety features of full racks, so they’re best for experienced lifters or those working with lighter loads.
Key Features to Consider
Weight Capacity
Don’t cheap out on weight capacity. The best squat rack for home gym use should handle at least 700-1000 pounds to accommodate future strength gains.
Always buy equipment rated well above your current lifting capacity. This ensures longevity and safety as you progress.
Adjustability
Look for racks with multiple height settings and hole spacing. Smaller hole spacing (typically 2-3 inches) allows for precise bar positioning.
This matters more than you’d think. Proper bar height makes the difference between smooth lifts and awkward, injury-prone movements.
Safety Features
Safety catches or spotter arms are non-negotiable if you’re lifting heavy at home. These features literally save lives when you’re training to failure alone.
J-hooks should have protective coating to prevent damage to your barbell. Look for UHMW plastic liners or similar materials that protect your equipment investment.
Stability and Construction
Heavy-gauge steel construction (11-gauge or thicker) provides the rock-solid stability you need. Wobbling racks are dangerous racks, especially when you’re under a loaded barbell.
Check the base width too. Wider bases prevent tipping and provide better overall stability during intense training sessions.
Top Squat Rack Options for Different Needs
Best Overall: Rogue R-4 Power Rack
The Rogue R-4 dominates the home gym market for good reason. Its 2×3″ steel construction and 1,000-pound capacity handle anything you throw at it.
The Westside hole spacing allows for precise adjustments. Plus, the endless attachment options mean your rack grows with your training needs.
Best Budget: CAP Barbell Power Rack
Don’t let the affordable price fool you. This rack delivers serious value for beginners and intermediate lifters building their first home gym.
It features a 500-pound capacity and includes essential attachments. While not as beefy as premium options, it’s perfect for those just starting their home gym journey.
Best for Small Spaces: Titan Fitness T-3
The T-3 packs serious functionality into a compact 48-inch depth. This makes it perfect for garage gyms or spare bedroom setups where space is premium.
Despite its smaller footprint, it maintains a 650-pound capacity. The 2×2″ steel uprights provide excellent stability without eating up valuable floor space.
Setting Up Your Home Gym Squat Rack
Space Requirements
Measure twice, order once. You’ll need minimum clearance of 8 feet in height and 10×10 feet of floor space for comfortable movement.
Consider your ceiling height carefully. You want room for overhead presses and pull-ups without bumping your hands or the barbell.
Flooring Considerations
Protect your floors with rubber mats or horse stall mats. These absorb impact, reduce noise, and prevent damage from dropped weights.
Three-quarter inch thickness works well for most setups. This provides excellent protection while remaining affordable and durable.
Essential Accessories
A quality barbell is your first add-on purchase. Look for Olympic-style bars with good knurling and 700-pound capacity minimum.
Bumper plates protect your floors and equipment during drops. Quality weight plates make a huge difference in your training experience.
Maximizing Your Squat Rack Investment
Versatile Exercises Beyond Squats
Your rack isn’t just for squats. Use it for bench pressing, overhead pressing, pull-ups, and rack pulls to maximize your investment.
Add resistance bands or chains for accommodating resistance training. These simple additions multiply your exercise options exponentially.
Progressive Training Strategies
Start with bodyweight movements to master form before adding weight. Your squat rack makes perfect squats safer and more effective from day one.
Track your progress religiously. Write down sets, reps, and weights to ensure consistent progression over time.
Maintenance and Longevity
Keep your rack clean and check bolts quarterly. A little preventive maintenance extends equipment life by decades.
Lubricate moving parts like J-hooks and safety catches twice yearly. This prevents wear and ensures smooth adjustments during workouts.
Common Mistakes to Avoid
Buying Based on Price Alone
The cheapest option usually costs more long-term. Poor quality racks wobble, rust, and fail when you need them most.
Invest in quality once rather than replacing cheap equipment repeatedly. Your safety and training consistency depend on it.
Ignoring Future Needs
That basic rack might work today, but what about six months from now? Choose equipment that accommodates growth in strength and training variety.
Attachment compatibility matters. Buying a rack that accepts standard accessories prevents costly replacements later.
Overlooking Assembly Complexity
Some racks require professional assembly or two-person setup. Factor this into your decision, especially if you’re building solo.
Read assembly reviews before purchasing. Poorly designed bolt patterns or missing instructions turn exciting deliveries into frustrating ordeals.
Building Your Complete Home Gym
Complementary Equipment
After securing your squat rack, add a quality adjustable bench for pressing variations. This opens up chest, shoulder, and accessory work possibilities.
Consider adding dumbbells for unilateral training and muscle balance. They’re perfect for addressing strength imbalances and injury prevention.
Cardio Integration
Don’t neglect cardiovascular fitness. A simple jump rope or rowing machine complements strength training beautifully.
Even basic cardio equipment helps maintain work capacity. This supports better recovery between strength sessions and overall health.
Training Wardrobe Essentials
Invest in comfortable workout clothes that allow full range of motion. Restrictive clothing hinders performance and increases injury risk.
Quality training shoes provide stability during heavy lifts. Flat-soled shoes work best for squats and deadlifts, while cushioned options suit general training.
Creating the Perfect Training Environment
Lighting and Ventilation
Proper lighting prevents form breakdown and reduces accident risk. Install bright, even lighting throughout your training space.
Good airflow keeps you comfortable during intense sessions. Fans or proper ventilation prevent overheating and maintain focus.
Motivation and Atmosphere
Add mirrors to check form and stay motivated during tough sets. Strategic mirror placement helps you self-coach effectively.
Create an inspiring atmosphere with motivational quotes or music. Your home gym environment should energize and focus your training mindset.
Cost-Benefit Analysis
Initial Investment vs. Gym Memberships
A quality squat rack costs $300-$1,500 depending on features. Compare this to gym memberships costing $50-$100 monthly.
Your rack pays for itself within 6-18 months. After that, you’re training for free while building home equity.
Long-Term Value
Quality racks last 20+ years with minimal maintenance. This translates to pennies per workout over the equipment’s lifetime.
Factor in saved commute time and gas money. The convenience alone justifies the investment for most home gym owners.
Safety First: Training Solo at Home
Proper Warm-Up Protocols
Never skip warm-ups, especially when training alone. Dynamic stretching and mobility work prevent injuries that could sideline your progress.
Start with empty bar work to groove movement patterns. This prepares your nervous system and joints for heavier loads.
Using Safety Features Correctly
Always set safety catches two inches below your bottom position. This provides protection without interfering with full range of motion.
Practice failing reps safely with light weight. Knowing how to bail properly gives you confidence to push limits safely.
When to Ask for Help
Don’t ego lift when training solo. Progressive overload works better than random max attempts that risk injury.
Consider hiring a coach for form checks. Virtual coaching options make expert guidance affordable and accessible.
The Best Squat Rack for Your Specific Goals
Bodybuilding Focus
Bodybuilders need high rep capacity and multiple attachment options. Look for racks accepting cable systems and lat pulldown attachments.
Adjustability becomes crucial for isolation work. Multiple bar positions allow for partial reps and specialized techniques.
Powerlifting and Strength
Powerlifters require maximum stability and weight capacity. Choose racks rated for 1,000+ pounds with solid competition-style dimensions.
Westside hole spacing enables precise positioning for competition-style training. This attention to detail carries over to meet day performance.
CrossFit and Functional Fitness
CrossFit athletes benefit from pull-up bar variations and quick transitions. Racks with multiple pull-up grips support varied WOD demands.
Consider foldable options if space is tight. These allow for versatile home gym setups that accommodate different training styles.
Matching Your Outfit to Your Training
Performance Over Fashion
Choose moisture-wicking fabrics that keep you dry during intense sessions. Comfort directly impacts training quality and consistency.
Proper fit matters more than brand names. Clothes should move with you, not restrict you during dynamic movements.
Seasonal Considerations
Winter training requires layering options for unheated garage gyms. Start warm and shed layers as your workout intensifies.
Summer calls for breathable, lightweight options that prevent overheating. Proper clothing maintains focus and performance year-round.
Upgrading Your Squat Rack Over Time
Adding Attachments
Start basic and add attachments as needs evolve. Dip bars, landmine attachments, and plate storage expand your training options.
Budget-friendly additions make big impacts. Even simple resistance band pegs multiply exercise variations dramatically.
Technology Integration
Modern racks accept velocity trackers and force plates for data-driven training. These tools optimize programming and prevent overtraining.
Apps and tracking devices provide accountability and progress visualization. Technology integration keeps training fresh and measurable.
Environmental Considerations
Noise Management
Rubber bumpers and mats significantly reduce noise transmission to neighbors or family members. This matters especially in shared living spaces.
Strategic placement away from bedrooms maintains household harmony. Your gains shouldn’t cost you relationships or lease deposits.
Temperature Control
Extreme temperatures affect both comfort and equipment longevity. Heaters or fans maintain optimal training conditions year-round.
Metal racks conduct temperature, making them uncomfortable in extreme heat or cold. Simple climate control prevents these issues.
Community and Support
Online Resources
Join home gym communities for setup ideas and troubleshooting help. These forums provide invaluable real-world experience and support.
YouTube channels offer endless exercise demonstrations and programming ideas. Free resources make expert coaching accessible to everyone.
Local Connections
Connect with other home gym owners in your area. Training partners increase accountability and motivation even in home settings.
Consider hosting small group workouts. Your investment becomes a community hub that benefits everyone involved.
Conclusion
Choosing the best squat rack for home gym success requires balancing budget, space, and training goals. The right rack transforms your fitness journey by eliminating barriers and maximizing convenience.
Whether you choose a full power rack, half rack, or squat stand, prioritize safety features and quality construction. Your investment pays dividends in health, strength, and training consistency for decades to come.
Start with essential features and expand as your experience grows. The perfect home gym evolves with your journey, and your squat rack remains the foundation throughout.
Frequently Asked Questions
What’s the minimum ceiling height needed for a squat rack? You’ll need at least 8 feet of clearance for comfortable use. This accommodates pull-ups and overhead pressing without restrictions or safety concerns.
Can I bolt my squat rack to the floor? Most racks offer bolt-down options for maximum stability. This is recommended for heavy lifting but requires permanent floor modification and landlord approval for rentals.
How much should I spend on my first squat rack? Budget $400-$800 for quality entry-level racks. This price range offers safety features and durability without breaking the bank or sacrificing essential functionality.
Do I need Olympic weights for my squat rack? Yes, most modern racks use Olympic-sized bars and plates. Standard 1-inch plates won’t work with quality barbells designed for serious strength training.
What’s the difference between power racks and squat racks? Power racks feature four uprights with enclosed safety catches. Squat racks typically have two uprights and may lack comprehensive safety features for solo training.
How long does assembly typically take? Expect 2-4 hours for full power rack assembly. Half racks and stands assemble faster, usually within 1-2 hours with basic tools and help.
Can women use the same squat racks as men? Absolutely! Squat racks are completely gender-neutral equipment. Adjustable heights accommodate all users regardless of size, and proper workout attire ensures comfort for everyone.